Ideas on How-To Attach
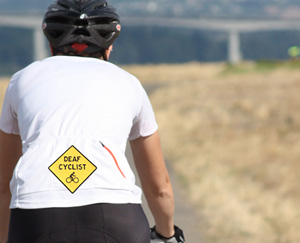
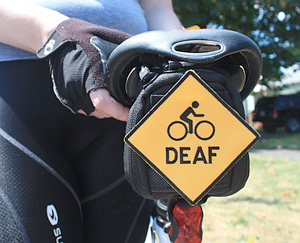
We know that all bikes and cyclists are different. How you decide to display your DeafBikeSigns will depend on your taste or sense of fashion. Some riders will prefer something temporary for specific riding events while other riders might want something more permanent for daily use. How you display your signs will depend on your bike and attached accessories. Be creative!


HOW TO ATTACH YOUR PATCHES
- Iron: Convenient, with greater permanence than stick on
Iron-On Adhesive is already included on all of our patches - Sew: Hand or machine stitch for permanence
- Velcro: Great for switching patches on the same accessory
- Button/Wire Loops: Add button holes and you can tie or button it to your accessory
- Magnetic Backing: Attach to metallic parts of your bike or accessory
- Pin: Good for temporary use; suggested on clothing
WHERE TO PLACE YOUR PATCHES, STICKERS OR/AND ALUMINUM PLATES
For best visibility, locate on the back.
- Back of your helmet
- Back of your saddle (on pouch bag or underneath attached to the frame)
- Back of fenders or Bike Rack
- Back of your shirt/jersey
For fun, you also can put stickers on water bottles.
WATERPROOF FABRIC PROTECTION
Consider waterproofing your patches. Spraying a waterproofing solution on your patches can improve their durability and lifetime. Highly recommended if you ride frequently in wet conditions or live in places such as Seattle, WA or Portland, OR.

